Can You Anneal Silver With a Butane Torch?
Annealing is a basic skill for working silver and other non-ferrous metals, but it requires a bit of heat. For many hobbyists, a butane torch seems to be the perfect compromise between form and safety, but how much use can you get out of one?
Well, let’s get into it and we’ll break down the facts. So, if you’ve ever wondered if you can anneal silver with a butane torch then read on!
Using a Butane Torch
Butane torches are cheap, readily accessible, and don’t require any special insurance to operate in your home. They also burn clean, which makes them a perfect choice for those of us working in a small living space instead of a proper workshop.
While butane torches aren’t all created equally, they always sit on the lower end of BTU output for a torch.
I’ve used one exclusively for everything but “big” melts (anything over 15g of silver) for a couple of years now, and they do have some limitations. Annealing is no exception, and you may have trouble annealing larger pieces of metal.
That said, I’ll show you how to handle larger pieces than you’d think with a butane torch.
It’s not a perfect choice, but they work well for most at-home use. Those working with an ounce or more of silver at a time will probably want an upgrade, however, and an Orca or propane plumber’s torch is a relatively safe setup for at-home use.
What is Annealing?
Annealing is a heat treatment process that makes metal softer and more ductile.
In silversmith work, it’s an extremely important process to master. Repeatedly annealing pieces is a large part of any kind of forming work, and the more metal you’re working with the more frequently you’ll need to anneal.
Annealing works by heating the metal slightly above its crystallization temperature. This process kind of “loosens up” the internal structure of the metal, which gets compacted when the metal is worked.
You’ll be doing a lot of annealing, especially if you have a penchant for fabrication. The reason you need to anneal silver (or copper/brass) so frequently is because of work hardening. As you work the metal the internal structure becomes more compact and eventually, the metal becomes hard to work.
Bending it beyond that point will result in the metal breaking. Have you ever bent a bit of wire back and forth until it breaks? That’s work hardening in action.
But metallurgy isn’t required to enjoy silversmithing at home, you just need to know that when the metal gets hard… it’s time to anneal.
How to Anneal Silver With a Butane Torch
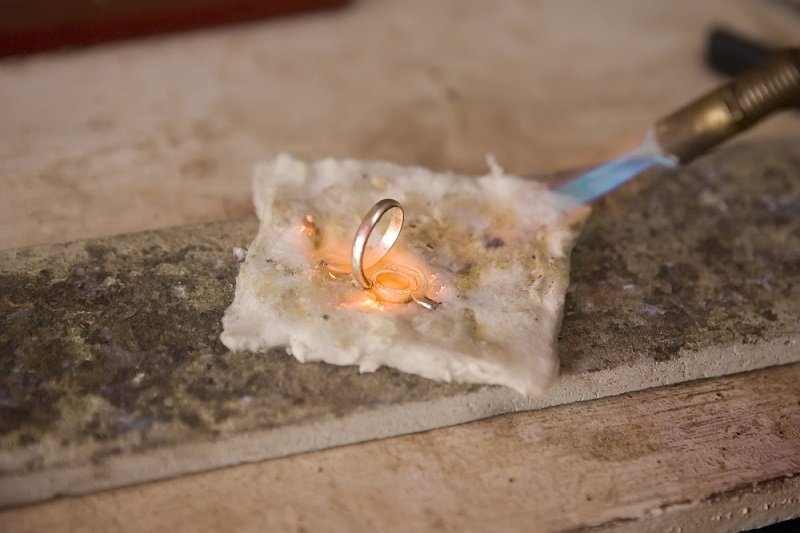
Butane produces a short jet of blue flame, and most torches don’t have a lot of adjustment potential. You’re going to want to use the tip of the flame most of the time, where things will be hottest.
Annealing silver is fairly straightforward:
- Dim the lights in your workshop so you can accurately see metal colors during the process.
- Heat the piece of silver evenly, using long, broad strokes over the surface with the torch.
- Keep the torch moving at a decent pace, but not too quickly. Too slow and you won’t get enough heat spread through the metal, too fast and no heat will absorb.
- Wait until the flame turns orange where it hits the metal. This is hard to see in some lighting, so position yourself where the flame is visible.
- Remove flame immediately from the piece once you have orange fire all along the piece. The flame is your indicator, but the metal will usually be starting to glow red at this point.
- Allow the silver to cool to a black temperature. “Black” in this context just means that it’s no longer glowing.
- Optionally, you can pass the flame back over the metal and bring it back up to annealing temperature a few more times. I aim for 30 seconds to 1 minute of time “at temp” with stubborn bits of metal.
- Cool the silver at a black temperature by dipping it in your quench jar or tray.
There are a number of different tricks people use to find the proper annealing temperature for silver. The proper temperature for annealing sterling is about 1100°F (~600°C), but you can go a bit higher or lower.
All annealing with a butane torch needs to be done on a surface that retains heat. A fire brick or solderite board are both good ways to mitigate the high thermal dissipation rate of silver.
Copper and brass can be annealed with the same process, or you can mark them with a Sharpie and remove the flame when it disappears. Sharpie disappears ~500-600°F while copper anneals at 700°F so it’s not perfect.
The Sharpie trick is actually an old machining trick since it disappears at just about the exact temperature for annealing aluminum. It can be used for silver but you’ll end up with the impression that the metal is much harder to form than it is when properly annealed.
That trick has somehow found its way into the collective consciousness of hobbyist jewelers. I’ve yet to hear a bench jeweler defend it as a good practice, but it remains hotly debated in some circles.
Just use the orange flame as your indication. It’s far more reliable unless you have no way of heating metal out of direct sunlight.
Annealing Larger Pieces of Silver With Butane
Larger pieces of silver can be a bit problematic when you’re working with a small torch. Butane doesn’t have a whole lot of BTUs to handle things like larger cuff bracelets.
That said, you’re not necessarily out of luck.
Instead of annealing the whole piece, you can anneal in sections. I frequently have to do this with square rods and thick wire, even if it’s just to get the whole piece settled in one spot to anneal it. It’s not uncommon for me to bend 1.5mm or 2mm silver rods at 3” intervals so that I can heat the whole piece at once for final annealing.
You won’t be able to do every piece of silver with a butane torch, but if you work in stages across the metal then you can eventually get most pieces annealed.
My “cut off” is about 25g of silver for annealing, but I’ve managed over a troy ounce (31.1g) with careful placement of the metal and a couple of bits of cut-up fire brick to help maintain heat.
I tend to dig “trenches” in my soft fire bricks for long, thin pieces of metal or stack a few bits to make an ad-hoc furnace for larger pieces. This isn’t always practical, but you can do a lot more with a butane torch than some people tell you. Learning to manipulate your heating surface is a basic skill that will help enormously as you get into more intricate work.
Annealing Troubleshooting FAQ
For more information on the process, I recommend checking on our guide to annealing but we can help you here with some of the problems commonly encountered when using a smaller torch.
Q: What happens if I heat the metal too much?
A: The grain structure of the metal will usually remain unchanged or become even worse for working with the metal. You’re not heating the metal up to “melt” it internally, just enough to allow the atoms to rearrange. Too much heat doesn’t actually do anything and often makes matters worse.
Q: What about not enough heat?
A: If you don’t use enough heat, which is easy with a butane torch… nothing will happen. The metal will get softer towards the ideal annealing temperature, but until it reaches a certain point there will be no change in the metal’s structure.
Q: What do I do if I overheat my silver?
A: Let the silver return to a black temperature, quench it, wipe off the water, and start over. Just “cooking” the metal more, or letting it return to a hot state and reheating it, will result in nothing at best and compromise the metal’s structure at worst.
Q: Help! I can’t get this piece to annealing temperature with a butane torch!
A: While that’s not a question, it’s a valid concern when working with a smaller, weaker heat source like butane. You may need to rearrange your heating station to heat some pieces of metal. It’s one reason I really like fire bricks as a soldering backing: you can work them into the needed shape without specialized tools.
Q: How often do I need to anneal silver?
A: It depends largely on the process you’re using, work hardening occurs at different rates. I tend to anneal between forming processes (ie: between forging and rolling an ingot), and then as needed. You’ll have to develop a feel for it.
Q: What if my silver gets too soft?
A: Work hardening is your best friend. Grab your rubber block and a hammer, or a mallet and your steel block or anvil, and whack it a few times. Test the hardness and then whack again. It’s the easiest way to harden silver, but it’s another skill that takes time to develop. No biggie if it gets too hard, just anneal it again!
- Online rock and mineral club for collectors of all levels!
- Find community with like-minded rock and mineral enthusiasts.
- Monthly Giveaways!
- Free Access to Entire Digital Library of Products (annual memberships)
