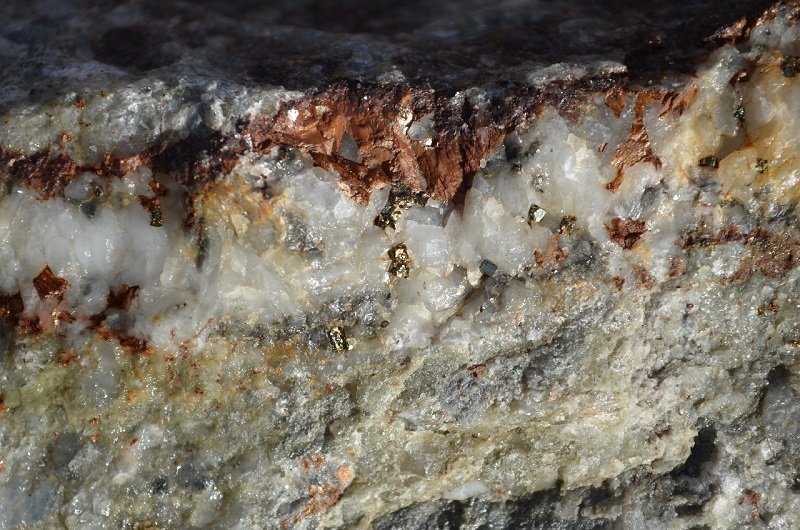
Gold-bearing quartz is one of the few ways that hard rock and native gold are found in nature. While a lot of it has been mined out, it’s still possible for prospectors to find chunks of it when they’re looking for gold. If you have some specimens, you’ve probably considered extracting the gold.
So, get your safety goggles, and let’s dig into a few methods that you can extract gold from quartz at home
Should You Extract the Specimen?
Before you get your hammer, you should carefully consider whether or not the specimen you’ve got should be broken down. It might sound counterintuitive but if you’re just after gold… well, a lot of times you’d be better off selling the specimen and just buying the gold yourself.
Due to its rarity, gold-bearing quartz can reach exceptionally high prices. You will almost invariably be able to get more than spot value from your gold by selling the specimen itself. It just takes a bit longer unless you already have a buyer ready.
Extracting the gold at home is more about the experience than actually making money. If cash is your end goal and you’ve got quartz-bearing visible gold then I recommend seeing if you can sell it as a specimen first.
What You Need
There are a few different methods you can use to extract the gold. I’ll be covering two and pointing you in the direction of more dangerous, but thorough, methods at the end of this article.
For either of the methods, you’ll need the following:
- Your specimens
- A 3-5lb sledgehammer
- A bucket, preferably metal
- A capped pipe of at least ¾”
- A piece of steel rod that fits inside the capped pipe, rebar works fine
- A funnel
- Kiln or oxy-acetylne torch
- Crucible
- Borax powder
- Ingot mold
You also require PPE for this.
As I point out whenever the subject of rock crushing comes up silicosis is downright terrifying. Quartz is pure silica, and you’re going to be vigorously crushing it into a powder with no water.
Work outdoors and wear a respirator.
You’ll also want safety glasses or goggles. The normal ANSI-rated ones are fine, goggles are preferable but not required. Quartz tends to do lots of “fun” stuff when hit with a hammer, so protect your eyes.
You may also want to pick up a pair of welding gloves if you’re going to melt. You can do it carefully without them, but you’ll still probably end up burning all the hair off the back of your hands.
I also recommend some form of hearing protection for the crushing. Steel on steel tends to ring, and you’ll be at it for a while. I’m not sure if it rises above the hearing damage threshold, but it’s best not to play around with your hearing. Foam earplugs work fine.
So now that you’ve got everything ready, it’s time to get started
Part #1: Crush and Pan
The easiest method to use is simply to crush and mechanically separate the gold like you would when panning. This doesn’t yield pure gold, but it’ll allow you to recover all visible particles from the crushed quartz.
Start by finding a spot you can hammer and smash in peace. It’s going to make some serious noise.
Afterward:
- Place your gold-bearing specimens in the bucket.
- Using your hammer, smash the specimen into chunks ⅛” to ¼” across
- Pour the smashed rock and dust through the funnel into the capped pipe
- Place the capped pipe on the ground or a workbench. Avoid concrete as the base, it may crack.
- Repeatedly smash the piece of rod downwards to crush the rock into powder.
- Smash until you have a powder about the consistency of rough sand.
- Pour the powder into your gold pan.
- Use a filled bucket to pan the gold as normal. I recommend the bucket so you don’t lose any gold in running water.
This method will get you the vast majority of gold in the material. The crushing process shouldn’t break up any visible gold too much, and the quartz powder will separate easily.
You can also use an iron mortar-and-pestle for crushing the rock, but it’s a lot more expensive and probably isn’t available at the local hardware store unlike some pipe and a bit of round stock.
The important part is to separate as much quartz as you can before you begin melting, so you have less to deal with.
Step #2: Melting It Out
Melting the gold out of the solution will recover smaller particles of gold than just panning it, but the procedure gets more expensive from here.
Ideally, you’ll have a kiln for this. Electric with tight temperature controls is ideal, but not required. You can pull this off with a DIY foundry or a torch as well. The important thing is to be able to maintain a temperature in excess of 2000°F (1093°C).
After powdering the mixture as described above, you’ll want to place the material in your crucible. Sprinkle borax liberally into the mixture.
The big thing is that you’ll need at least one hand free and something to scrape slag with. A graphite rod is ideal since they don’t conduct heat and can resist heat. You can also use steel, but be careful not to let it get hot enough to burn you.
Wear your gloves if you have them.
As the gold and quartz dust melt, the gold will fall to the bottom of the solution. Most attendant minerals will quickly oxidize and float on the surface of the metal. This forms slag which should be removed.
You should wear a respirator during this process, not everything in native gold is safe once it reaches higher heat.
Gold melts at 1948°F (1064°C) but may melt at slightly different temperatures due to the admixture.
Preheat the ingot mold once you’ve removed most of the slag, leaving the gold molten. Graphite molds just need to be heated until the water is pulled out of them, they’ll change color slightly when ready. Iron needs to be preheated to a couple of hundred degrees.
Take the molten gold in the crucible and pour it into the mold once there’s no visible slag on the surface. You may need to sprinkle more flux to get it as clean as possible before the pour.
Pour carefully, then allow the gold to cool.
And that’s as far as most of us will be able to get the gold separated at home.
The gold should be of pretty high purity once you’ve melted it, particularly if you fluxed well and were careful about scraping off any slag. Many metals that occur as an admixture will be removed this way.
An acid test will help you verify the purity of the gold in a rough sense.
To further purify the gold, you’ll need to resort to chemical methods. There’s no “household chemical” solution to this problem. In 99% of cases, a refiner is your best bet if you want to go further. Purification requires strong acids, mercury compounds, or cyanide compounds and isn’t a DIY activity for most people.
Chemical Extractions and Safety
My risk tolerance is much higher than most, but none of the common methods of chemical gold extraction are within that risk tolerance. All of the methods used are serious chemical procedures and should only be undertaken if you have the right equipment and PPE.
I’m not qualified to give you advice on handling chemicals like nitric acid and cyanide salts. They’re major safety hazards and one misstep can be disastrous.
If you absolutely insist on doing it at home, this rough overview will get you going in the right direction. Just be safe! Gold is worth a lot, but it’s not worth your health.
- Online rock and mineral club for collectors of all levels!
- Find community with like-minded rock and mineral enthusiasts.
- Monthly Giveaways!
- Free Access to Entire Digital Library of Products (annual memberships)
