Silversmithing is a great way to let out some creativity, especially once you’ve got the basics down. That said, there are still some risks associated with working hot metal that you need to be aware of. Not all of them are obvious, either.
So, let’s take a look at what you need to be aware of and how to protect yourself!
Safety Glasses Are Essential

If you’re working with any kind of tools, chemicals, or heated material you need to protect your eyes. Silversmithing… involves all three.
ANSI-rated safety glasses are the way to go for most tasks. Something like these will keep your eyes protected from the majority of hazards.
Safety glasses aren’t optional.
If you’re planning on working with strong chemicals for things like etching your silver, you may want to keep a pair of goggles as well. They’ll wrap around and protect you from liquids better than a pair of glasses.
In any case, protect your eyes. It can be a bit inconvenient, but not quite as inconvenient as ending up blind.
Fire and Heat Hazards and Protection
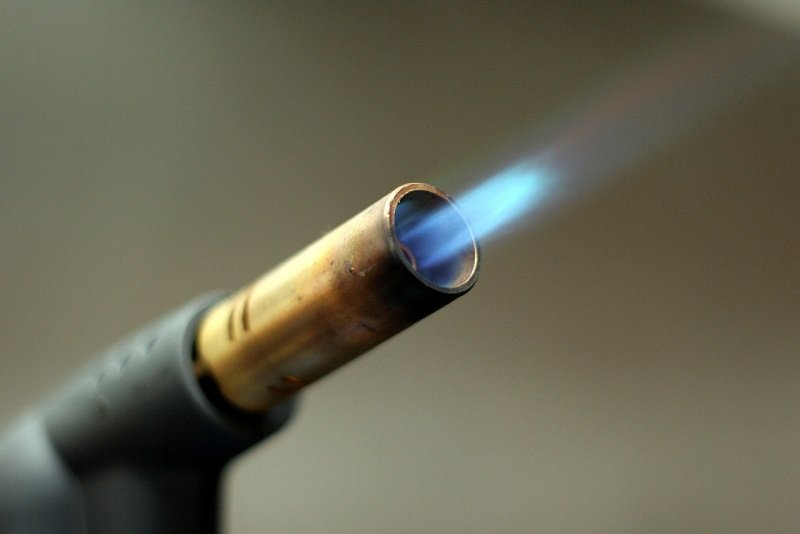
Heat is the most obvious hazard contained in our workshops. Whether it’s soldering, annealing, or melting down metal… it’s a pretty much omnipresent hazard.
Hot metal can make a mess of you in no time. Bare skin contact with hot metal can cause second-degree burns with ease, and that’s when the metal is at a “black” temperature. Orange-hot silver is a guarantee to third-degree burns, and molten silver getting loose is… not good.
Depending on your setup, you may also have a kiln or other high-temperature device that can create very high temperatures. If you’ve never melted down metal before, you may not realize how intense the heat is. Sterling silver melts at 1640°F (893°C), and it takes a lot of thermal energy to melt anything more than a few grams of metal.
The heat that is given off from the metal’s surface via infrared radiation? That can burn off hair and cause minor burns just from being near it.
Fortunately, this is a simple hazard to protect yourself from.
Procedures to Avoid Getting Burned
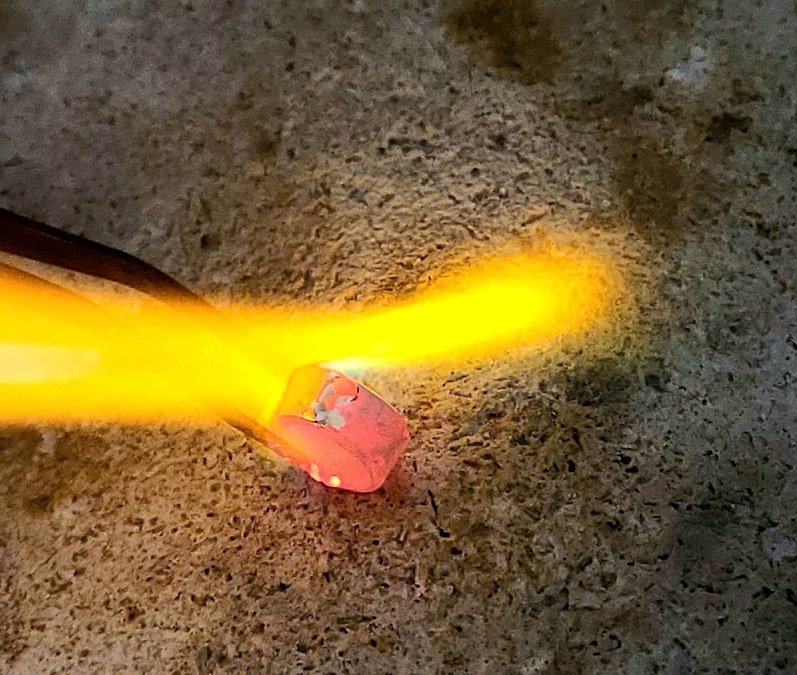
Very few people are going to stick their pinky in a blob of molten silver. Likewise, most of us are a bit nervous when pouring from crucibles or heating large pieces of metal.
In my experience, most burns come from not establishing good habits in the workshop.
In chemistry safety, there is a rule that simply states: “Hot glass looks like cold glass.” That’s not exactly the case here, but black temperature metal has caused most of the burns I’ve seen. The rest have been mostly caused by contact with a soldering surface that was still hot.
If it’s on the bricks, blocks, or other soldering surface pick it up with tweezers or pliers and quench it before you handle it. As an ingrained habit, it’s a great way to avoid getting hurt. It seems ridiculous at times… until it’s not.
Perhaps once every three or four months? I’ll pop something I “knew” was cold into the water and hear it sizzle. That’s a painful burn avoided.
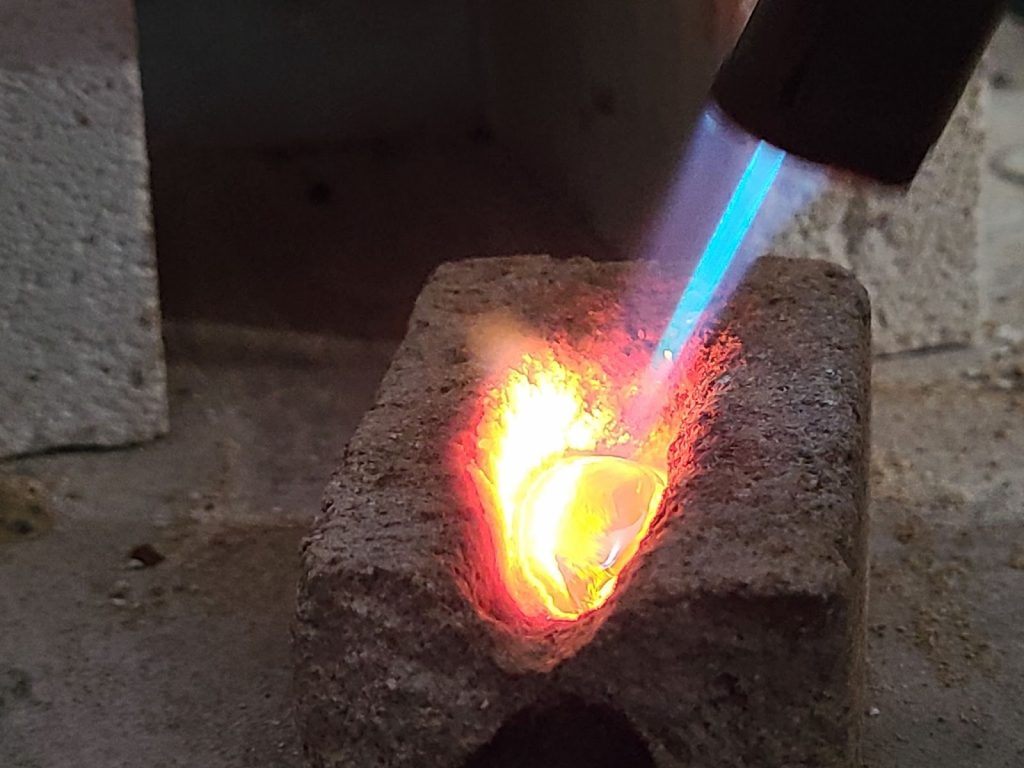
Likewise, you should take care with any surface you use your torch on. Silica firebricks and charcoal both hold heat for a long time, for instance and after a long soldering operation or melt they can be dangerously hot.
Protecting Yourself From Hot Metal
For the most part, however, what you need to protect yourself from is fumbling silver. A leather apron is a perfect choice to protect your torso and legs. They’re pretty handy for other things too, including collecting metal dust if you don’t have a sweeps tray set up.
Gloves are good if you’re using a kiln for larger melts. If you have enough silver molten at one time it can definitely burn hands that get too close.
When it comes to protection from fire and heat, your best defense is simply to make sure you’re working carefully in the first place.
Make sure you have a firm grip when moving hot silver, a safe place for any operations involving flame, and emergency measures like fire extinguishers should be within reach.
The back of your hand is tougher than the palm but will still sense heat. Use that to your advantage if you’re not sure if a surface or workpiece is safe to touch, if you get too close you’ll still be able to use your fingers.
One other thing: remember that heat travels by conduction. Any metallic tools that have come in contact with hot silver should be treated as hot until you’ve checked them.
Dust and Fume Protection
Dust and fumes are both things you’ll need to deal with in your workshop. Silver isn’t particularly toxic, but you still want to avoid inhaling any of it inadvertently.
Fumes are going to be present often. Pickle, patina solutions, and even soldering will all generate fumes with varying degrees of toxicity.
You have two solutions to these problems:
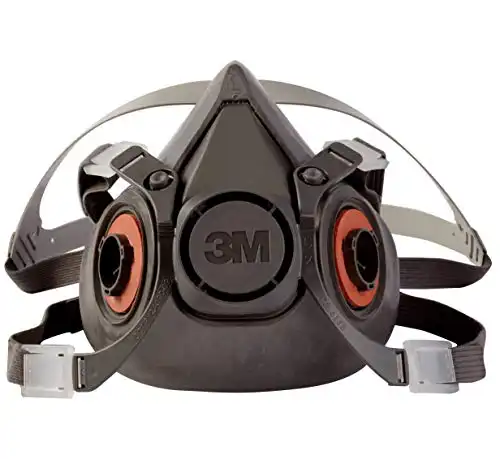
- Dust Mask- Suitable for sanding, grinding, and other operations which just generate dust. Something like an N95 is better than a standard mask, but either will work.
- Respirator- Respirators can be fitted with cartridges designed to sort out chemical fumes in addition to particulate matter. They may be required in workshops without good ventilation when using chemicals or soldering.
Ventilation is required long-term, especially if you’re using a lot of chemicals or soldering frequently. Fume hoods are the best idea, whether DIY or purpose-bought from a supplier.
That said, if you’re careful about frequency and airflow, you can work indoors without much risk. You should be cautious about how much you’re doing if you don’t have some sort of fume extraction., but a simple box fan running on two windows opposite of each other will move most fumes rapidly.
Metal dust from filing and sanding is pretty heavy, and not likely to go airborne on a regular basis. The problem lies with silica dust, which can cause silicosis and should be treated with care. The main sources are fire bricks and sandpaper in the workshop, but it’s also a major problem if you’re doing lapidary work in the same area.
Polish is particularly bad about this, as many of them are silica-based. Polishing boxes work great, allowing you to get the work done without pushing a ton of polish into the air around you. An extraction hood should do the trick as well, but you should don a mask whenever you’re polishing regardless.
There’s no real way to keep dust completely out of the shop.
Chemical fumes from acidic or basic solutions aren’t a constant hazard, but they show up. Pickle and patina solutions are the most common sources, but it really depends on what you’re doing in the shop on that day.
Regardless, a lot of new silversmiths don’t realize just how nasty some of these fumes can be. It’s vital to protect yourself, especially if you’re planning on doing this long-term!
Other Hazards
You’ll get cuts, scrapes, and even the occasional bruise while working silver.
For these, basic first aid is usually sufficient:
- Apply pressure until bleeding stops.
- Clean wound.
- Bandage appropriately.
Which will solve 90% of the small sheet metal or tool slippage cuts you run into.
Some are nastier than others, jewelry saws will leave you with a painful, jagged laceration that’s shallow but often takes a long time to quit bleeding. On the other hand, most sheet metal will leave you with a shallow, smooth cut that clots very quickly.
Keep the address for an urgent care clinic nearby and know where the nearest ER is.
Serious burns, whether large 2nd degree or any 3rd degree, require treatment. Some cuts will also require treatment, stitches suck but they minimize scarring and help avoid infection.
The solution to all of this is just to be careful, know some basic first aid, and know where you’re headed if you need treatment.
Do all of that before you need treatment, I’ve had to look up a place for urgent care with one hand while trying to keep pressure on the other to stop bleeding with a shop rag. It’s not fun.
Safe By Design: Thinking Through Your Workshop’s Layout
While a lot of people might undertake their silversmithing somewhere like the dining room table, you still need to put some thought into how you manage things.
I recommend the following precautions:
- Always try to work near a window if you lack a fume extraction hood or another way to remove soldering and chemical fumes.
- Keep an extra set of pliers or tweezers handy during heated operations. If you fumble the first pair you can grab pick them up with that pair to avoid getting burned.
- Keep a fire extinguisher handy just in case.
- Layer up protection for soldering. I use a fire brick on a ceramic tile at the least, oftentimes I’ll have a second layer of fire brick just in case.
- Open your quench container before you fire up the torch . Trying to open a jar one-handed while you’re holding red hot metal is a great way to make things worse.
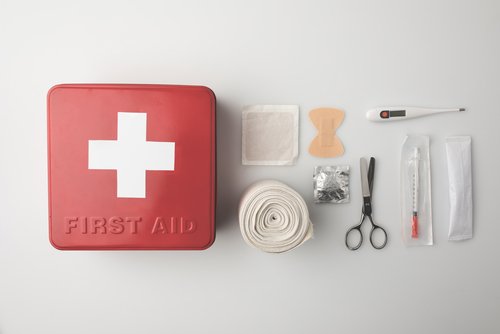
- A first aid kit is a must. You need more than a couple of band-aids just in case.
A lot of safety is just making sure that you have good protocols in the shop and work from there.
I recommend spending some time actually thinking about your workshop safety habits and preparations. You’re the one responsible for completing your workpiece while keeping yourself intact, and PPE should only come into play when your initial guidelines have failed.
- Online rock and mineral club for collectors of all levels!
- Find community with like-minded rock and mineral enthusiasts.
- Monthly Giveaways!
- Free Access to Entire Digital Library of Products (current and future products)*
